

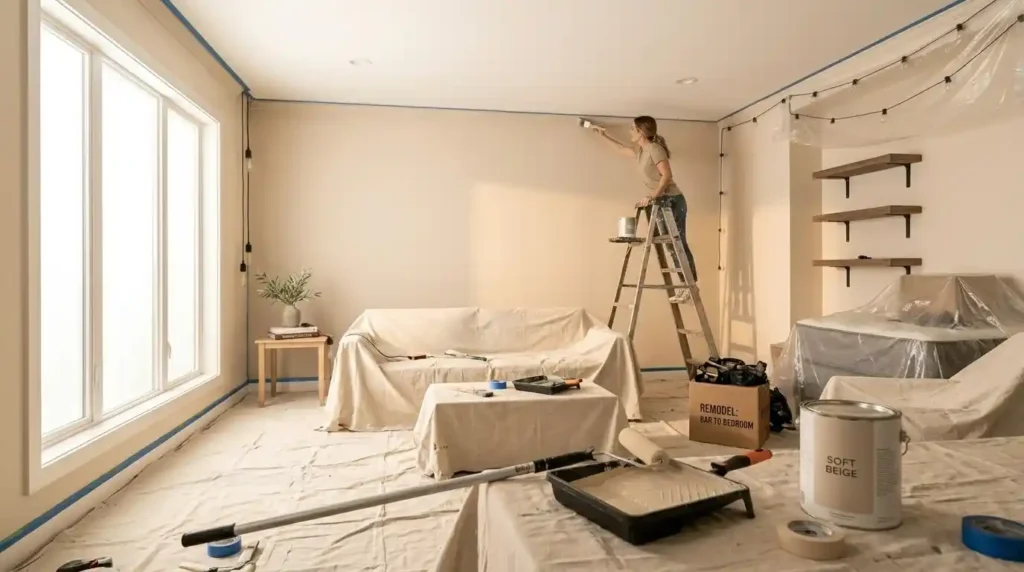
Learning how to paint a room correctly is the most fulfilling DIY activity that one can learn as a homeowner. It is inexpensive, very effective, and something that one can do in just a couple of days. But the reality of it is that almost everyone who does it. For the first time makes a couple of very basic mistakes. Such as not doing any preparation, using incorrect painting tools or removing the tape. At the wrong time and ends up getting a result that was far from what they expected. I have painted many rooms by now and still. Use the exact same steps for each room no matter which room I am painting.
In this guide, all aspects of preparation, choosing the right tools, cutting in, rolling, and cleaning up are explained. Some of them may be not commonly discussed but are vital to get a professional result. All stages of painting are important, and none of them is as hard as they may seem at first sight.
The Supplies You Need Before You Learn How to Paint a Room:
It is mandatory to have the right tools before getting started. That makes all the difference between an easy and a hard job. It goes without saying that the persons who indulge in DIY projects. Will agree with the fact that it is much better to have good tools than good paint.
Essential Tools for Painting a Room:
The core tool list for how to paint a room covers more items than most beginners expect. You will need a paintbrush specifically a 2.5 inch angle sash brush for cutting in plus. A paint roller, roller cover, and roller sleeve matched to your wall texture. A 3/8 inch nap roller standard is the right choice for smooth to lightly textured walls. Additionally, a paint tray or paint roller tray holds your paint during rolling. While a small handheld paint pail makes cutting in considerably easier.
An extension pole and paint roller extension pole are essential for ceilings and upper wall sections without a stepladder. Painter’s tape or Frog Tape creates clean edges along trim, ceilings, and baseboards. Drop cloths either canvas drop cloth or plastic drop cloth protect floors and furniture throughout the process. Rounding out the list: damp rags, a paint stick or stir stick. A paint can opener, putty knife, sanding sponge, and a 220 grit sandpaper for patching areas.
Choosing the Right Paint and Finish:
Paints for the interiors really matter more than the techniques used. The paints like Benjamin Moore Aura, Benjamin Moore Regal Select, Behr. Or Sherwin Williams are high-quality and provide much better coverage compared to the inexpensive ones. The quality of the paint is particularly important. When you are changing the colors from dark to light. Since cheaper paints need to be applied twice for full coverage. Paint finish selection depends on the room’s function. Flat finish paint and matte finish paint work well in adult bedrooms, dining rooms. And low-traffic formal spaces where imperfections need hiding more than durability. Satin finish paint handles family rooms and hallways well .
The proper type of paint to use in kitchens, bathrooms. And any room where constant cleaning is required would be semi-gloss finish paint. Gloss finish paint should only be applied to trim areas of the house. Ceiling paint should be used on ceilings. Zero VOC paint and low VOC paint are worth choosing for better indoor air quality. Even though zero VOC paint still emits some compounds for up to 48 hours. During and after application, with continued low-level emission for two weeks continued VOC emission low level afterward.
Room Preparation: The Step That Determines Everything Else in How to Paint a Room
Room preparation is where most DIY paint projects succeed or fail before the first brushstroke lands. Consequently, investing time here pays dividends throughout the rest of the process.
Clearing and Protecting the Space:
First physical step on how to paint a room involves removing any furniture from the room when possible. Where this is not feasible, large items of furniture. Should be placed in the middle of the room and covered with a drop cloth. Drop cloth placement on the floor is done all over the area where painting is going to take place. Remove outlet covers and light switch plates using a screwdriver storing screws. In a Ziploc bag brush storage container prevents losing them. Remove curtains painting and remove wall decor to avoid paint drips landing on fabric or artwork. Additionally, tape off areas along trim, baseboards. And ceiling edges using painter’s tape pressed firmly to prevent paint bleed prevention later. Remove the tape at the right moment while paint is still wet. To avoid tape removal pulling cured paint and creating jagged lines instead of clean crisp paint lines.
Patching, Sanding, and Cleaning Walls:
Wall surface preparation determines how smoothly your final paint looks. Fill nail holes and fill screw holes using spackle application with a putty knife. Once dry, sand patched areas smooth using 220 grit sandpaper patch sanding. And wipe away residual dust with a damp cloth. For larger patch holes drywall damage. Apply primer over the repaired area before painting. Otherwise the patch will show as a dull spot under the finished coat. Clean walls before painting using mild detergent wall cleaning. To remove grease walls, dust, and surface grime that prevent paint adhesion. For rooms that haven’t been painted in many years. A thorough surface cleaning makes a visible difference in how evenly the paint lays. Furthermore, if you are switching from an oil-based existing paint to latex, light sanding. And a bonding primer are both required otherwise adhesion fails.
Priming: When It’s Necessary and When to Skip It
Do I need primer before painting a room is one of the most common questions. Beginners ask and the honest answer depends on surface condition. Self-priming paint and paint and primer combination products work well. On previously painted walls in good condition where color change is minor. On the other hand, use primer in the following four conditions: for new drywall. When changing colors from dark to light, for staining cover-up. And for areas where patches have been applied recently. Using an all-purpose primer, or high hiding primer. Or even a tinted primer which matches your wall color will decrease the total number of coats that you need. Not using primer on new drywall guarantees that you get uneven finish and texture.
The Right Painting Order: How to Paint a Room From Ceiling to Trim to Walls
Knowing the right way to paint is an essential requirement for a professional finish. There is one rule that holds true in all professional guides regarding painting. Start with the ceiling, then the trim, followed by the walls.
How to Paint a Room Starting With the Ceiling:
The painting of ceiling first ensures that the paint splashes will not fall on newly painted walls and trim. First of all, the ceiling paint is poured into a smaller paint can. And is cut around the ceiling edges with an angle sash brush 2.5 inches wide. Next, a paint roller with ceiling texture roller sleeve should be used to roll the ceiling in one continuous direction. Overlapping each row with one width of the roller to avoid noticeable lines. Rolling the ceiling in the opposite direction from the first row provides the best result. The paint for ceiling dries in 2 to 4 hours between coats.
Painting Trim, Moldings, and Baseboards:
Trim can be painted prior to the wall being painted such that any overlapping of paint onto the wall. Can be easily concealed by painting the wall afterwards. Trim can be painted using semi-gloss or gloss paints in a paintbrush over the trimmings, baseboard, and window sills. If the trim has been previously painted, then priming may not be necessary. But in case the trim has no previous coating, an all-purpose primer should be applied prior to painting. Then tape off trim, moldings, and baseboards to protect the finished trim surface when you move to painting walls. This sequence prevents the most common finish problem beginners create. Rolling wall paint onto trim and trying to hand-fix the overlap later.
How to Paint a Room Walls: Cutting In and Rolling
Cutting in is the technique that defines a professional-looking interior painting result. Use a 2.5 inch angle sash brush to cut in the areas around the ceiling line, baseboard lines, corners. And window frames, working 6 inches away from each edge. The paint for the walls is held in a hand-held paint pail at this point. Making it easy to use the brush while you do not have to keep going back to the tray. As soon as the cut in is completed, switch to the roller. As the wet edge painting ensures the blend of the brush work into the roller work.
Load the roller from the paint tray and roll the W pattern rolling technique. Onto the wall a W shape approximately 24 to 32 inches W pattern width. Then fill in the empty spaces using top to bottom strokes without lifting the roller. Maintain a wet edge painting throughout and avoid lap mark prevention mistakes by not overworking already-rolled sections. Two coats standard coverage is the rule for most colors. With 1 to 2 hours interior dry time between each coat depending on humidity and ventilation.
Finishing, Cleanup, and the Details That Complete How to Paint a Room:
The final phase of how to paint a room involves tape removal, tool cleanup. And a careful review of the finished surface. Rushing either of these steps undoes the work done earlier.
Removing Tape and Reviewing the Result:
The tape must be removed when the paint is still wet to get a clean edge. If the paint dries out, the possibility that the tape will take off. The top layer of the paint with it becomes greater. Resulting in a peeled edge instead of a sharp one. It is advisable to use a putty knife on the edge of the tape. To create a score in case the paint has dried out before the removal process. After the tape has been removed. Stand away and look at the job done under natural light. Since natural light will show the uneven areas and paint drips much better than the artificial one. The areas can be fixed with a small paintbrush and paint.
Cleaning Tools and Storing Leftover Paint:
Proper brush and roller cleanup extends tool lifespan significantly, which matters when a quality paintbrush costs $15 to $25. Clean latex paint tools using warm soapy water cleanup spray off excess paint. With a garden hose brush cleaning technique first. Then work a brush cleaning tool or your hands through the bristles in soapy water. Rinse thoroughly, and allow to air dry. Wrap the brushes with the help of plastic wrap brush holder or Ziploc while not applying the paint between coats. Close the container tightly and store the paint in inverted position to prevent skin formation inside the paint container. Write the room number, color name, and date on the paint can for the future purpose of touch-ups. It is better to apply the touch up paint from the same paint can that was used earlier in the room.
Conclusion:
Knowledge about how to paint a room effectively is something that. Each property owner should take the time to understand well since the procedure will always pay back handsomely. How to paint a room involves steps from preparing the surfaces. All the way to cutting in, rolling and proper cleanup. And it is all learnable and very attainable in just a weekend for most rooms. What will make the difference is the quality of preparation, choice of tools, order of painting and waiting between layers. Follow the step-by-step process that is presented in this guide. Do not rush anything and how to paint a room will cease being. A daunting task but rather a very rewarding weekend project.
Frequently Asked Questions (FAQ’s)
Paint-and-primer products can work well on previously painted walls that are clean and in good condition. Separate primer is the better choice for new drywall, major dark-to-light color changes, stains, or recently patched areas where consistent coverage matters.
The easiest way to learn how to paint a room is to work in a clear sequence: prepare the surfaces, paint the ceiling, finish the trim, and then move to the walls. Careful preparation and the right tools usually have a bigger impact on the final result than rushing into the first coat.
Cut in around the edges first, then roll while the paint is still wet so the brushed and rolled areas blend together. Use a W-shaped rolling pattern, maintain a wet edge, and avoid repeatedly rolling over sections that have already started drying.
Paint the ceiling first, followed by the trim and then the walls. This order makes it easier to cover accidental splashes and overlapping paint without damaging areas that have already received their final coat.
Matte or flat finishes suit lower-traffic rooms where hiding surface imperfections matters, while satin works well in family rooms and hallways. Semi-gloss is more practical for kitchens and bathrooms that need regular cleaning, and gloss is generally better reserved for trim.

1 thought on “How to Paint a Room: 9 Powerful Steps for a Flawless Finish and the Beginner Mistakes That Ruin Everything”