

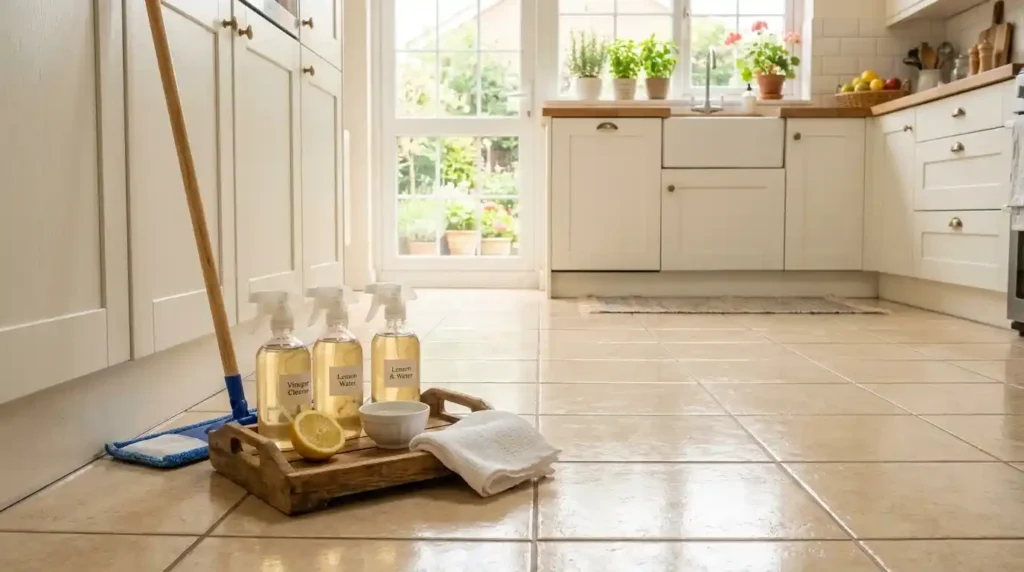
The cleaning products cupboard in a typical family home tells a story that nobody planned. There’s a bottle for hardwood, one for tiles, a separate one for laminate, something for the bathroom floor, and a general-purpose spray that gets used on everything else out of resignation. Add it up across a year and the cost is real and none of it accounts for what those products are actually putting onto surfaces that children crawl across and pets press their faces into.
I started making my own diy floor cleaning solution about eight years ago when my youngest was pulling herself across the kitchen tiles and I realised I had no idea what was in the bottle I’d just mopped with. The switch was less dramatic than I expected. A few pantry staples, one afternoon of testing on different surfaces, and I haven’t bought a commercial floor cleaner since. The floors look better, cost less to maintain, and I know exactly what’s on them at any given point.
That last part matters more than people give it credit for. The US EPA has consistently flagged improper storage and residue from commercial cleaning products as a risk factor in homes with young children and pets. The CDC’s 2022 poison control report identified cleaning products as one of the leading sources of emergency calls involving kids. Making your own doesn’t eliminate every risk, but it puts you in control of the ingredient list in a way that buying a supermarket cleaner alternative never quite does.
Why the Same Solution Doesn’t Work on Every Floor in a Middle-Class Home
The thing that trips up most families isn’t making the cleaner it’s assuming one formula works across every surface. A typical middle-class home with multiple floor types might have hardwood in the living room, ceramic tile floors in the kitchen and bathrooms, laminate floors or LVP floors in the bedrooms, and possibly engineered wood floors somewhere in between. Each one has different chemistry, different moisture tolerance, and different reactions to acidic or abrasive ingredients.
Sealed hardwood and engineered wood are tolerant of diluted vinegar in a way their unsealed cousins simply aren’t. Pour the same solution on a waxed floor and the wax starts breaking down not dramatically, not all at once, but enough that six months later the floor looks flat and dull in a way that no amount of buffing reverses. Timber floors that have been stripped to bare wood are in the same category. They need to stay as dry as possible, and anything acidic speeds up the very deterioration that proper maintenance is supposed to prevent. Hot water is the other culprit people underestimate it doesn’t warp sealed wood the way it affects laminate, but it does stress the finish over time in a way that warm water simply doesn’t.
Laminate and vinyl wood planks are built to look like wood and they fool a lot of people into treating them like it. They’re not. The surface layer is tough but the core material swells when moisture gets in through the edges and seams, and the first sign is usually a slight rise along a joint line that most people initially blame on humidity. By the time the plank is visibly lifting, the moisture has been sitting in the subfloor for a while. The recipe matters less here than the method whatever solution goes down needs to go down lightly.
Natural stone floors marble, granite, slate catch people out because they look like they should be tough, and the same misreading applies to stone surfaces elsewhere in the home; quartz vs quartzite is a distinction that matters for the same reasons. They’re porous, which means acidic cleaners like vinegar etch the surface rather than cleaning it. The same goes for grout lines between natural stone tiles: acid eats grout over time, and a diy floor cleaning solution that works perfectly on ceramic tile floors is actively damaging on marble. For natural stone, the only appropriate base is a pH-neutral solution with no acid and no bleach.
Rubber flooring in a home gym or playroom needs low-residue cleaners anything that leaves a film makes the surface slick in a way that matters when children are running across it. Concrete floors and sealed cement floors are the most tolerant surfaces in most homes and can handle stronger formulas, including a baking soda paste for stubborn grime in high-traffic areas.
The patch test a small amount of any new solution on an inconspicuous spot, left to dry and checked before mopping the whole floor takes two minutes and catches every surface incompatibility before it becomes a problem. It’s the step that experienced home cleaners do automatically and that guides consistently underemphasise because it sounds too obvious to bother writing down.
The Ingredient List That Covers Every Surface in the House
White vinegar is the one I reach for first, and the reason is straightforward: it works on most hard floors, costs almost nothing per clean, and dries without leaving anything behind on sealed surfaces. Ceramic tile and porcelain specifically the vinegar’s acidity dissolves mineral deposits and hard water spots in a way that general-purpose sprays seem to just move around without actually lifting. The limit is real though and worth stating clearly: vinegar doesn’t belong on marble, granite, waxed floors, unsealed hardwood, or sealed timber where the manufacturer’s guidance specifies pH-neutral only. Push past that and you’re not cleaning anymore, you’re slowly degrading.
Rubbing alcohol 70% isopropyl alcohol is the useful concentration, not 91% is the disinfecting element that vinegar alone doesn’t provide. It kills pathogens on hard surfaces, evaporates fast, and leaves no residue. Combined with vinegar and a small amount of dish soap, it becomes the base of the most versatile diy floor cleaning solution for a multi-floor home. The standard ratio that holds up across most hard floor surfaces: 2 cups water, half cup white vinegar, quarter cup rubbing alcohol, and a few drops of liquid dish soap no more than that, because excess soap doesn’t clean better, it just leaves a film that attracts more dirt.
Castile soap seems like a natural addition but has a specific incompatibility problem: mixed with vinegar, the acid breaks down the soap back into its base oils, which then leave streaks on the floor. The chemistry isn’t complicated acid plus base produces something neither but it trips up a lot of homemade cleaner recipes that list both as ingredients without flagging the conflict. Sal Suds doesn’t have this problem and works as the better option in any recipe that also uses vinegar.
Baking soda earns its place as a paste scrubbed into grout lines or worked onto a particularly stubborn tile stain with a soft-bristle brush. That’s genuinely where it shines. Add it to a vinegar-based mopping solution though and the two ingredients spend their energy reacting with each other rather than with the floor carbon dioxide released, cleaning power cancelled, a slightly fizzy bucket of what is essentially salt water. Applied dry in a liquid solution it leaves a gritty white residue that requires extra rinsing to shift. The EWG has consistently flagged Borax as a concern for respiratory safety and developmental toxicity it scores an F on their scale which puts it off the ingredient list for a family-safe cleaner regardless of how often it appears in older DIY cleaning guides.
Hard water is the variable most homemade floor cleaner guides ignore completely. Unfiltered tap water has mineral content that settles onto floors as it dries not streaks from the cleaner, streaks from the water itself. The solution is either to towel dry the floor before those deposits set, or to mix the cleaner with distilled or filtered water from the start. In areas with particularly hard water, this one change produces better results than switching recipes.
Lemon juice is worth knowing as a degreasing ingredient for ceramic and porcelain tile it’s naturally acidic, smells genuinely clean, and handles the kitchen grease that builds up around cooking areas faster than other rooms. The same acidity that makes it effective on tile means it shares vinegar’s limitations on stone and unsealed timber, which is just the same rule applied to a different bottle.
Olive oil in a sealed hardwood formula a teaspoon per spray bottle, no more conditions the finish as it cleans. It’s not polish, it’s maintenance, and the difference shows in how the floor looks six months into a regular cleaning routine versus six months of a water-and-vinegar-only approach. Essential oils are worth including for the antimicrobial contribution as much as the scent: lavender essential oil, lemon essential oil, eucalyptus oil, peppermint oil, orange essential oil are the reliable choices. Tea tree is the one to leave out in any home with cats at any concentration, it’s toxic to felines, and a regularly mopped floor is consistent enough exposure to matter.
Seasonal blends come into their own once the surface-by-surface routine is working. A cinnamon and orange combination in the colder months changes the whole feeling of the cleaning ritual in a way that’s hard to explain until you’ve tried it the kitchen smells warm rather than sterile, and that makes the job feel different even when the method is exactly the same. In summer, mint and lime do the opposite: sharp, fresh, cuts through the grime that accumulates when doors stay open and foot traffic doubles. Citrus-infused vinegar citrus peels soaked in white vinegar for 5 to 7 days, strained, diluted with water is the version that reuses kitchen waste while delivering better grease-cutting performance than plain vinegar, particularly on kitchen tile floors where cooking residue builds up faster than other rooms.
The Recipes by Floor Type That Hold Up in a Real Family Home
Sealed hardwood and engineered wood floors: 2 cups warm water, half cup white vinegar, 1 teaspoon olive oil, 10 drops lemon essential oil into a spray bottle. Work one section at a time and keep the mist light. A microfiber cloth wiped with the grain picks up what the spray loosens; a soft towel run over the surface afterward takes care of any remaining moisture before it has time to sit on the finish. The olive oil does quiet work here the floor stays conditioned across the cleaning rather than just cleaned.
Laminate floors and LVP floors: 2 cups water, half cup white vinegar, quarter cup rubbing alcohol, 2 drops liquid dish soap. The emphasis on 2 drops rather than a teaspoon isn’t pedantry it’s the difference between a no-rinse floor cleaner that actually needs no rinsing and one that leaves a slightly sticky surface two hours later. Spray lightly, wipe with a microfiber pad, change the pad between rooms. Alcohol evaporates fast enough that the floor is walkable almost immediately.
Ceramic tile floors and grout lines: 1 cup white vinegar, 1 gallon warm water, a few drops dish soap in the bucket before anything else. Mop the tile surface in sections, then take a soft-bristle scrub brush to the grout lines while the solution is still fresh. Rinse with clean water and dry this matters more than most guides acknowledge. Black gloss tiles will show every water mark from across the room if they’re left to air dry, and the towel step takes thirty seconds per section.
Natural stone floors — marble, granite, slate: Sal Suds, a few drops, in warm distilled water. That’s it. No vinegar, no citrus, no baking soda. The temptation to add something stronger when the floor still looks dull after cleaning is understandable and worth resisting natural stone that looks dull after pH-neutral cleaning usually has a surface residue or etching issue that needs addressing separately, not a more aggressive cleaner.
Rubber flooring: Half cup rubbing alcohol, 1 and a half cups warm water, 1 to 2 drops dish soap. The microfiber cloth rather than a mop head handles rubber flooring more effectively it lifts rather than spreads, and the low-residue result means the surface stays non-slip after drying.
The Routine That Makes DIY Floor Cleaning Actually Stick
Vacuum before mopping not sweep, vacuum. The distinction matters because a broom moves fine grit from one part of the floor to another without removing it. Mix that grit with a wet mop and it becomes a mild abrasive sitting between the cleaning pad and the floor surface on every stroke. The damage is slow and invisible in any single session, which is exactly why it accumulates unnoticed across months of regular cleaning.
Mop in 3-foot sections and deal with the mop head between each one. This is the step people skip when they’re tired and in a hurry, and it’s the one that determines whether the floor is actually cleaner after mopping or just wet. A mop head that’s picked up what was on the first three feet of floor is now depositing it on the next three. String mops and sponge mops need rinsing in clean water at each section not a quick swirl, a proper rinse and wring. Microfiber pads need swapping between rooms.
Label spray bottles. An acid-based vinegar solution used on a marble floor because two bottles looked similar is the kind of avoidable mistake that produces an etched surface and a floor refinishing bill. Two minutes with a label maker prevents it permanently.
Never use any diy floor cleaning solution in a steam mop. Steam devices are engineered for water only adding any solution, homemade or commercial, risks voiding the warranty and damaging internal components. Distilled water only in the steam tank, and the floor cleaner in a separate spray bottle for manual application.
Once a week mopping with the appropriate surface-specific formula, spot cleaning in between, and a deeper scrub of tile and grout monthly that’s the rhythm that keeps a middle-class home with multiple floor types consistently clean without the cleaning products cupboard filling up with half-used bottles of things that all claim to do the same job.
Conclusion
Making your own diy floor cleaning solution is not a project that demands expertise or a long shopping list. A handful of pantry ingredients, matched correctly to each floor type in the house, replaces every bottle in the cleaning cupboard while costing a fraction of what commercial products charge for the same result. The formulas covered here have been tested on sealed hardwood, laminate, ceramic tile, natural stone, rubber, and concrete — each one tuned to what that surface actually needs rather than what a generic cleaner assumes. Vacuum first, mop light, label your bottles, and work in sections. The routine takes shape quickly, and within a few weeks it stops feeling like a change and starts feeling like the obvious way the floors should have been cleaned all along.
