

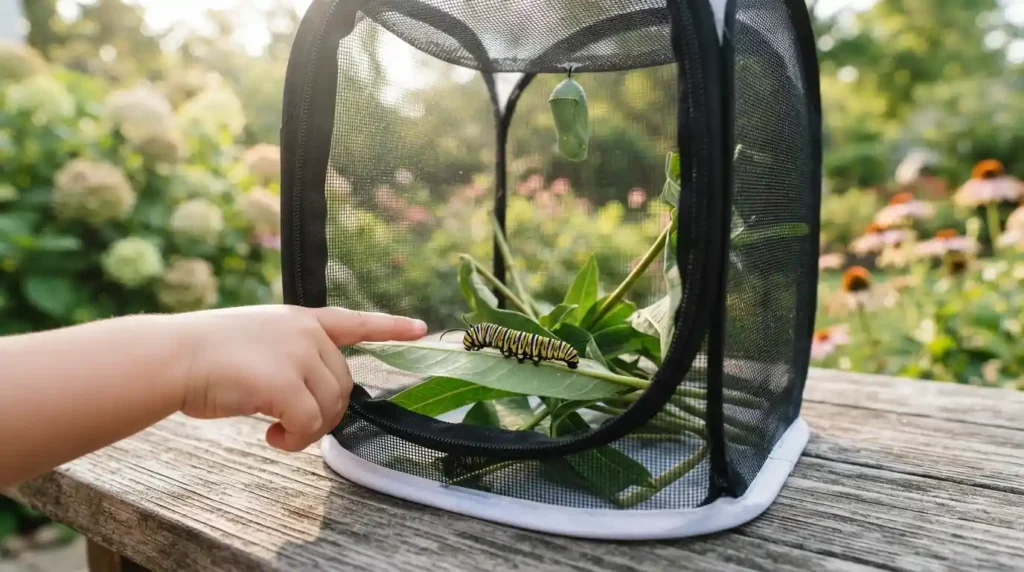
My daughter found a caterpillar on our dill plant two summers ago. Refused to let it go back outside, not a chance. That’s basically the whole origin story here. Neither of us had any real idea what caterpillar housing required, and our first attempt, a mason jar with some holes poked in the lid, killed the poor thing in four days flat. Marjorie next door set us straight after that, she’s been raising monarchs in her garden for something like fifteen years now. Turns out we’d gotten almost everything wrong. Below is what we’ve picked up since then, host plants, proper enclosures, temperature, all the small stuff nobody warns you about until something dies on your watch.
Why Most First Attempts at Caterpillar Housing Fail
Our jar disaster wasn’t some rare mistake, Marjorie told me, it’s basically the default one. People assume a container with a few air holes counts as a real habitat. It doesn’t, not even close. Airflow matters, sure, but caterpillars also need food constantly on hand, room to actually move, and some way for moisture to escape instead of just sitting there in a sealed jar breeding mold. We’d also grabbed our caterpillar off some random weed by the fence, no clue what it actually ate, which alone probably doomed the thing before the jar ever entered the picture. Caterpillar housing starts before you bring anything indoors at all, really, knowing the exact host plant it came from and having a fresh supply of that plant waiting.
The Jar Mistake Almost Everyone Makes
Glass traps humidity in a way mesh just doesn’t. Mold shows up fast in that kind of environment, sometimes within a day or two if the weather’s warm. Marjorie’s rule now, anything with solid walls gets tossed, mesh or nothing.
Matching the Caterpillar to Its Actual Food Source
We got lucky ours came off dill. Black swallowtails eat dill, parsley, fennel, all fairly reliable. Had it come off something else, a maple leaf say, we’d have been completely lost on what to feed it. That’s exactly where most people’s first attempt falls apart, usually in the first week.
Building a Proper Mesh Habitat at Home
Mesh solves most of what killed our first try. Marjorie’s run some version of the same basic setup for over a decade without much trouble at all. Airflow honestly matters more than almost anything else here, caterpillars produce a surprising amount of waste for their size, and that moisture needs somewhere to go instead of sitting and breeding problems. Room to move counts too, sounds minor until you actually watch one pacing back and forth in a container too small, hunting for somewhere to pupate that isn’t there.
Store-Bought Kits vs Homemade Enclosures
Bought a proper mesh kit after the jar failure, around $25, made an obvious difference within days. Marjorie still uses old zippered laundry nets stretched over a wire frame for hers. Cheaper. Works about as well once you’ve got the basic shape figured out.
What Size and Airflow a Habitat Actually Needs
Bigger than I would’ve guessed, honestly, that was Marjorie’s whole answer when I asked. One caterpillar needs room to wander before it forms a chrysalis. Cram a few too many in there together and you’re multiplying waste and disease risk fast, not just a little. Mesh on at least two sides, not only the top, keeps air actually moving through instead of just sitting stale.
Choosing the Right Host Plants for Your Region
This is where Marjorie spent the most time correcting me, patiently, over three separate conversations at least. Get the host plant wrong and you end up with a caterpillar that either starves or one that never shows up in your yard to begin with. Monarchs need milkweed. Nothing else works for them, full stop, no substitutes exist. Swallowtails give you more room to work with depending on the exact species, dill and parsley for black swallowtails, spicebush specifically if you’re after the spicebush kind. Get the plants right ahead of time and your garden basically turns into caterpillar housing on its own, no jar required whatsoever.
Milkweed for Monarchs and Why It’s Non-Negotiable
Monarch caterpillars can’t physically eat anything besides milkweed. Several varieties exist depending on your climate zone, but skip the plant and you skip monarchs in your yard entirely, no way around it. Marjorie planted three different types across her beds just to stagger when it’s available through the season.
Dill, Parsley, Fennel, and Spicebush for Swallowtails
We keep dill and parsley planted now specifically expecting caterpillars to demolish them by midsummer, treat them as sacrificial crops basically. Spicebush pulls in a totally different swallowtail species. Marjorie’s advice, plant a mix instead of betting everything on one plant, better odds that way of attracting something worth watching.
Understanding the Life Cycle Stages Inside the Habitat
Watching a caterpillar move through its stages is honestly the whole point of doing this. Knowing what’s normal versus what’s actually concerning saves a lot of needless panic along the way. Caterpillars stay in that hungry, constantly growing larval stage for roughly five to ten days after hatching, tripling in size during that window, which is genuinely wild to watch happen in real time. They molt repeatedly too, shedding this thin papery skin that looks alarming scattered around the habitat floor if nobody warned you what it actually was.
Molting, Instars, and What’s Normal to See
Panicked the first time we found what looked like a dead, shriveled caterpillar segment in there. Texted Marjorie a photo at nine at night, half expecting bad news. Just shed skin, she said. Completely normal. Happens at every instar as the caterpillar outgrows its own exterior.
The J-Shape and What It Means for Pupating
Eventually it climbs up somewhere high and hangs upside down in a J-shape, that’s the signal a chrysalis is coming. Don’t move the habitat once you see this, Marjorie warned pretty firmly, disturbing them mid-transition can genuinely mess up the whole process.
Caring for the Chrysalis and Preparing for Release
Once the chrysalis actually forms, there’s genuinely less to do, which felt strange after weeks of constant feeding and checking on it. Wait a full 24 hours after pupation before touching anything, and even then, handle the lid rather than the chrysalis itself if you absolutely need to move it. Butterflies typically emerge somewhere between seven and ten days out, and the chrysalis darkens noticeably right before that happens, which is honestly the only real warning you get.
How Long the Chrysalis Stage Actually Takes
Ours took nine days, right in the middle of what Marjorie described as typical. Weather nudges that window slightly, warmer conditions tend to speed the whole thing along a bit faster.
Releasing Butterflies Successfully
Released ours late morning, sun warmed up enough but before real afternoon heat set in, Marjorie’s advice again. Release near actual nectar plants in the yard if you can, gives them food immediately instead of leaving them cold and disoriented, searching around for something to eat.
Common Mistakes That Harm Caterpillars in Captivity
A handful of mistakes come up over and over, Marjorie’s fielded questions from half the neighborhood at this point, practically runs an informal help desk. Overcrowding tops the list, too many caterpillars crammed into one small habitat, disease spreads fast that way and stress builds up in ways you won’t necessarily notice until it’s too late to fix. Temperature swings matter more than most people assume too, general guidance says keep things between 50 and 85 degrees Fahrenheit, and straying outside that range can genuinely do damage.
Overcrowding and Disease Risk
Made this exact mistake with a second batch, five caterpillars crammed into a habitat sized for two. Lost one within days. Marjorie said that’s a pretty typical outcome once space gets that tight.
Handling Caterpillars Too Much or Too Roughly
Kids want to hold them constantly, understandably, mine included. Excessive handling stresses them out though and can damage their bodies more easily than you’d expect from something that looks fairly sturdy. Settled on a look-don’t-touch rule early on. Made a real difference in how many actually survived long enough to release.
Conclusion
Two summers into this now, and what we’ve got looks nothing like that doomed mason jar from the beginning. Mesh, the right host plants, patience through the chrysalis stage, that’s really the whole formula when you strip it down. My daughter still checks the habitat every single morning before school. So do I, honestly. Find your own local Marjorie if you’re starting out, someone who’s already burned through the mistakes so you don’t have to repeat every single one yourself.
FAQs
What’s the best type of habitat for raising caterpillars at home?
A mesh enclosure with airflow on at least two sides works far better than a sealed jar, since caterpillars need ventilation to avoid moisture buildup and mold. Store-bought mesh kits run around $25, though a repurposed zippered laundry net over a wire frame works nearly as well.
How long does it take for a caterpillar to become a butterfly?
Caterpillars typically spend 5 to 10 days in the larval stage before forming a chrysalis, and butterflies usually emerge 7 to 10 days after that. The whole process from hatching to release generally takes around three weeks total.
What plants should I grow to attract caterpillars to my garden?
Milkweed is essential for monarch caterpillars and has no real substitute, while black swallowtails rely on dill, parsley, and fennel. Planting a mix of host plants specific to butterflies in your region gives the best chance of attracting a variety of species.
Is it safe to handle caterpillars while raising them?
Occasional gentle handling is generally fine, but frequent or rough handling can stress caterpillars and damage their soft bodies. Keeping interaction minimal, especially around molting and pupation, tends to improve survival rates significantly.
