

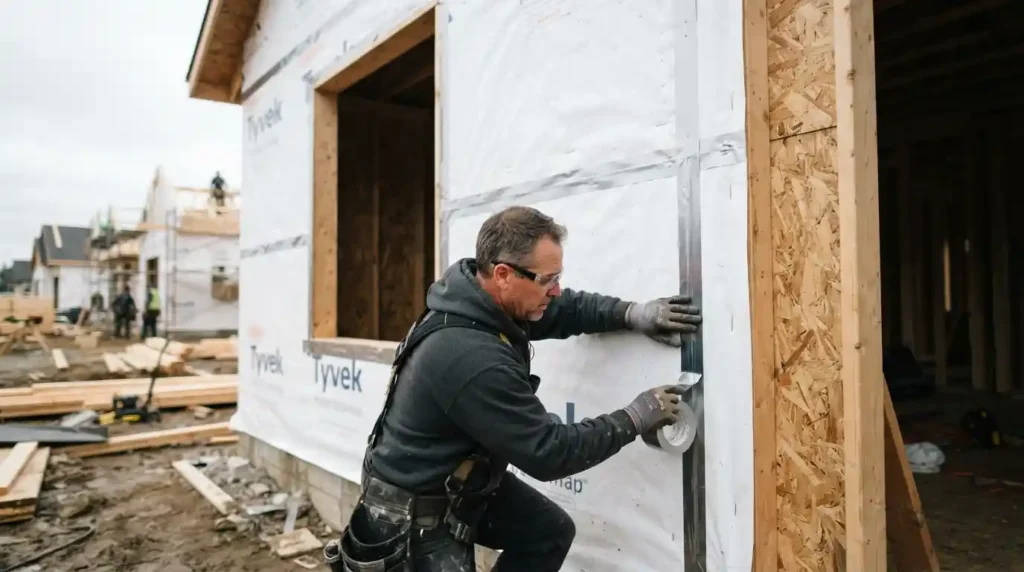
A contractor I worked with years ago used to say the wrap goes on in an afternoon and gets forgotten for the next thirty years. He wasn’t wrong. Homeowners spend weeks picking siding colors and cabinet finishes, then barely blink when the crew rolls out house wrap before lunch. Nobody photographs it. Nobody asks about perm ratings at the paint counter. Yet that thin layer sitting behind the siding decides whether the wall framing stays dry or slowly rots for a decade without anyone noticing. Tyvek house wrap is the product most people have heard of and understood least, which is exactly why the mistakes around it are so common and so expensive to undo. Getting the material choice right matters. Getting the installation sequence right matters more. This guide walks through both, in the order they actually need to happen, not the order most product pages present them.
Why Tyvek House Wrap Matters More Than Homeowners Realize
Most people know Tyvek as the white paper wrapped around a house mid construction, and that’s about where the knowledge stops. The material itself does more engineering work than its plain appearance suggests, and understanding what it’s built from explains why installation details matter so much later.
What Tyvek House Wrap Actually Is and What It’s Made Of
DuPont Tyvek is not paper, even though it looks and sounds like it. It’s made from high density polyethylene fibers, spun and heat bonded into a non woven material with a uniform web structure. That microporous structure is the whole trick. The pores are small enough to block liquid water yet open enough to let water vapor pass through. Compare that to woven house wrap options like Typar BuildingWrap or cross woven polypropylene products, which use a different manufacturing approach entirely and often land at different permeability numbers as a result.
Tyvek HomeWrap is the standard residential version most builders reach for first. StuccoWrap adds a grooved surface designed specifically for stucco applications, creating a drainage gap that flat wrap simply doesn’t offer. DrainWrap does something similar for other cladding types where bulk water drainage behind the siding is a real concern. CommercialWrap exists for larger scale and higher UV exposure situations. None of these products are interchangeable despite looking nearly identical off the roll. Choosing the wrong variant for the cladding type is one of those decisions that looks harmless in the moment and shows up as a moisture problem three years later.
How Tyvek House Wrap Protects the Building Envelope
The building envelope is really just a fancy term for everything standing between your framing and the weather outside. Tyvek house wrap sits in that assembly as the water resistive barrier, often shortened to WRB in spec sheets and permit documents. Its job is narrower than people assume. It’s not there to make the house airtight on its own, though it does contribute to air infiltration resistance. Its primary function is managing moisture, both blocking bulk water from getting in and letting trapped vapor escape before it condenses inside the wall cavity.
Wall cavity drying matters more in humid climates and coastal regions, but honestly every climate zone benefits from it eventually. I’ve seen wood sheathing that looked structurally sound from outside turn out spongy and dark once the siding came off, purely because the original wrap had failed at the seams. Mold prevention and rot prevention aren’t marketing language here, they’re the actual measurable outcome of a wrap doing its job correctly. Skip this layer, or install it poorly, and the framing behind it starts absorbing moisture nobody can see until the damage is already expensive.
Tyvek House Wrap Performance Numbers That Actually Matter
Every wrap brand publishes technical specifications, and most homeowners never read past the price tag. That’s a mistake, because two numbers in particular predict how the wrap performs over its lifespan far better than brand reputation does.
Vapor Permeability and Breathability Explained
Vapor permeability gets measured in perms, and Tyvek HomeWrap typically lands somewhere between 56 and 58 perms according to ASTM E96 testing. That’s a genuinely high number compared to competitors. Typar BuildingWrap sits around 11.7 perms, and Barricade Wrap Plus comes in near 16 perms. Most building science guidance recommends a wrap somewhere in the 10 to 20 perm range for general use, so Tyvek actually exceeds that range by a wide margin. Whether that’s an advantage depends entirely on your climate and wall assembly. In humid climate zones, higher permeability lets trapped vapor escape faster, sometimes five times faster than basic budget wraps according to industry comparisons.
In certain mixed and cold climate assemblies with specific vapor retarders already built in, that same high permeability can occasionally work against the design intent, which is why an experienced contractor should weigh climate zone before defaulting to the highest perm number available. ASTM E2556 Type II is the specification most WRB products get tested against, and it’s worth asking your contractor whether the product on your job actually meets it. Don’t just take the box label at face value. I’ve watched homeowners assume all house wrap performs identically because it all looks like white paper from the driveway, and that assumption costs them later when the wrong product meets the wrong climate.
Water Holdout, Drainage and Tear Strength
Water holdout describes how well the wrap resists liquid water under pressure, and Tyvek HomeWrap tests around 210 cm on standard holdout measurements. Drainage efficiency is a separate number entirely, and it matters most with products like StuccoWrap, which achieves roughly 90 percent drainage efficiency thanks to its grooved surface creating a real drainage gap. Flat, non grooved wraps rely more heavily on the siding installation itself to create any drainage plane, which is a riskier bet in wetter climates. Tear strength is the number contractors care about on windy job sites, since a wrap that tears during installation defeats its own purpose before the siding even goes up. Tyvek HomeWrap tests around 6.9 lb tear strength, generally holding up better than lighter budget alternatives during handling.
Surfactant resistance is a lesser known weakness worth mentioning honestly. Certain wood stains and treated lumber can leach surfactants that degrade some house wraps over repeated exposure, and Tyvek has documented vulnerabilities here that some competing products handle differently. UV exposure limits also matter more than most people expect during a stalled construction timeline. Standard Tyvek HomeWrap is rated for roughly 120 days of UV exposure before it needs covering, while basic economy wraps may only tolerate 60 days, and commercial grade products can stretch past 180 days. Miss that window and you’re often looking at a full replacement before siding even starts.
Tyvek House Wrap Installation Done Right
Even the best rated wrap fails if it goes on incorrectly, and installation mistakes cause far more real world moisture problems than material defects ever do. The sequence matters just as much as the product choice.
Sheathing Prep, Overlap and Seam Taping
Installation always starts from the bottom of the wall and works upward, never the reverse. That direction lets each horizontal course shed water downward and outward, over the course below it, the same way roof shingles work. Getting that backward is a surprisingly common mistake, and it essentially guarantees water finds its way behind the wrap eventually. Horizontal overlaps should run at least 6 inches, though many contractors push toward 12 inches in wetter regions for extra insurance. Vertical seams need their own overlap too, and every seam, horizontal and vertical, should get taped with Tyvek tape or another compatible WRB tape rated for the job.
Untaped seams are responsible for an estimated 90 percent of wrap related seam failures, largely due to a phenomenon called wind pumping, where wind pressure actually pulls moisture through unsealed gaps repeatedly over time. Cap nails or cap staples should secure the wrap to OSB or plywood sheathing at manufacturer specified spacing, close enough to hold the wrap flat without over penetrating the surface. Skipping seam tape to save an afternoon of labor is exactly the kind of shortcut that looks fine on installation day and turns into a five figure repair bill down the line, often well after the original crew has moved on to other jobs entirely.
Window and Door Flashing Sequence
Window and door openings cause a disproportionate share of moisture failures, with roughly 80 percent of wrap related moisture problems tracing back to openings rather than the flat wall field. The flashing sequence around a rough opening needs to layer correctly, similar to shingles, so water sheds outward at every transition. Wrap should tuck below the window sill first, then side flashing goes on, then wrap comes down over the head flashing last, never the other way around. Getting that sequence backward creates a shelf where water collects instead of draining away. Door flashing follows nearly identical logic, and any penetration through the wrap, vents, pipes, electrical fixtures, needs its own sealing detail rather than a quick patch of tape slapped over the gap.
Torn wrap sections need proper repair patches using compatible tape, not just any tape sitting in the truck. Using the wrong tape type is a subtle but common mistake, since some tapes don’t bond properly to Tyvek’s specific surface and peel away within a year or two. I’ve walked job sites where the wrap itself was flawless and the window flashing was backward, and that one detail undid most of the wrap’s benefit around every opening in the house. If there’s one area worth paying a contractor to slow down and do carefully, this is it.
Tyvek House Wrap vs the Alternatives
This wrap dominates a lot of the conversation around house wrap, partly through brand recognition, but it’s genuinely not the only credible option on the market in 2026.
Tyvek HomeWrap, StuccoWrap and DrainWrap Compared
Choosing between Tyvek’s own product line depends almost entirely on cladding type rather than personal preference. HomeWrap works well as a general purpose flat wrap under vinyl siding, fiber cement, and most standard cladding types. StuccoWrap exists specifically because stucco applications need a dedicated drainage gap behind the material, roughly 0.02 inch, that flat wrap can’t provide on its own. DrainWrap serves a similar drainage focused role for other cladding systems where bulk water management behind the siding matters more than it would under simple lap siding. Using flat HomeWrap under stucco is a mistake I’ve seen more than once, and it tends to trap moisture against the stucco rather than letting it drain, which defeats the entire purpose of the barrier.
Commercial jobs often specify CommercialWrap instead, largely for its extended UV exposure rating during longer construction timelines that residential jobs rarely face. None of these products cost dramatically different amounts, so the decision really should come down to what the cladding actually needs rather than which box is cheapest at the supply yard that week. A good contractor will ask about cladding type before quoting a wrap product, and if they don’t ask, it’s worth raising the question yourself before the truck shows up with the wrong roll.
Typar, ZIP System and Other Competitors
Typar BuildingWrap is the most common direct competitor, using woven polypropylene construction instead of Tyvek’s non woven approach, and it tests around 11.7 perms compared to Tyvek’s higher range. Barricade Wrap Plus lands near 16 perms and markets itself on a similar drainage and durability platform. ZIP System takes a completely different approach, integrating the WRB directly into the sheathing panel itself, taped at the seams during panel installation rather than wrapped separately afterward. That integrated approach appeals to builders who want fewer trade handoffs on site. Henry Blueskin VP100 is a self adhered peel and stick membrane, often chosen for higher performance assemblies or challenging climate zones where a fully adhered barrier makes sense.
VaproShield markets heavily toward Passive House and high performance builds where vapor management tolerances are tighter than standard residential work requires. HydroGap from Benjamin Obdyke uses a dimpled drainage mat design. That reportedly moves roughly 100 times more bulk water than a standard flat wrap, according to manufacturer testing. None of these alternatives make Tyvek obsolete, and in plenty of standard residential jobs. Tyvek HomeWrap remains a perfectly sound, well tested choice.
Tyvek House Wrap Costs and Common Mistakes
Cost conversations around house wrap tend to get skipped entirely. Mostly because the material itself is a small line item compared to siding or roofing. That’s a mistake in its own right.
Real Cost Numbers for 2026
Material cost for Tyvek house wrap runs around $0.15 per square foot on its own, which sounds almost trivial. Installed pricing tells a more complete story. Landing between $0.70 and $0.86 per square foot as a national average heading into 2026, once labor gets factored in. Choosing Tyvek over a generic budget wrap typically adds somewhere between $200 and $400 to a standard home’s total wrap cost. Which is a small premium against the total build. Contractor markup on materials commonly runs 13 to 22 percent. So it’s worth asking for an itemized breakdown rather than accepting a bundled number. Getting three to five estimates before committing remains solid advice, since pricing varies more between contractors than most homeowners expect.
Late fall and early winter tend to bring softer contractor pricing. Since crews have more open schedule gaps during that stretch. Negotiating directly with suppliers can sometimes shave close to 20 percent off material costs on larger jobs. None of these numbers matter much next to the real risk, though. Skip proper wrap entirely, or install it badly. And rot repairs down the line commonly exceed $10,000 once framing and sheathing both need replacement. A wrap that gets left exposed past its 120 day UV limit without covering can also mean a full $1,000 plus replacement. Before siding even starts, an entirely avoidable cost with better scheduling.
Installation Mistakes That Cause Failures
Most wrap failures trace back to a short list of repeated mistakes rather than material defects. Untaped seams top that list, responsible for the large majority of seam related failures over time. Improper window and door flashing sits close behind. And together these two issues cause the overwhelming share of real world moisture problems behind siding. Installing wrap upside down, starting from the top rather than the bottom. Is rarer but still shows up occasionally on rushed jobs. Using plastic sheeting as a substitute for proper WRB material is a mistake some budget conscious builders still make. And it behaves nothing like a true vapor permeable wrap once moisture gets involved. Exceeding the UV exposure window during a delayed project timeline quietly degrades the wrap’s performance long before anyone notices visually.
Wrong tape type is a smaller but persistent issue. Since some generic tapes don’t bond properly and peel within a season or two of weather exposure. Torn sections left unrepaired create an obvious weak point that undermines an otherwise correctly installed wrap. A licensed, insured siding contractor familiar with local building code. And the relevant ASTM standards is worth the extra vetting time before hiring. Building codes, including the International Building Code 2021 and various municipal WRB requirements. Increasingly specify these details directly, so a contractor cutting corners here isn’t just risking moisture damage. They’re risking a failed inspection too.
Conclusion
Tyvek house wrap looks like the simplest part of a home’s exterior. And that’s exactly why it gets rushed more often than it should. The material science behind it, vapor permeability, drainage design, tear strength. Actually predicts a lot about how a wall assembly will perform for the next thirty years. Choosing the right variant for your cladding type matters. Getting the overlap direction, seam taping, and window flashing sequence right matters even more.
Since installation mistakes cause far more real damage than any material shortfall does. The cost difference between doing it right. And cutting corners is genuinely small next to the five figure repair bills. That show up when moisture gets behind untaped seams or backward flashing. Treat the wrap as a structural decision rather than an afterthought before the siding goes up. And it quietly does its job for decades without anyone ever needing to think about it again.
Frequently Asked Questions (FAQ’s)
Not entirely, and that’s actually intentional. Tyvek house wrap is water resistive rather than fully waterproof. Meaning it blocks bulk liquid water from passing through while still allowing water vapor to escape outward. A truly waterproof membrane would trap moisture vapor inside the wall cavity, which causes more rot problems than it solves. The microporous structure is designed specifically to manage both sides of that equation at once.
Yes, every seam should be taped, both horizontal and vertical. Skipping this step is one of the most common installation mistakes. And untaped seams are responsible for the vast majority of seam related failures over time. Largely due to wind pumping pulling moisture through unsealed gaps. Only Tyvek tape or another compatible WRB tape should be used. Since generic tape often fails to bond properly and peels away within a year or two.
Standard Tyvek HomeWrap carries roughly a 120 day UV exposure rating before it needs to be covered with siding. Basic economy wraps often tolerate closer to 60 days, while commercial grade products can handle 180 days or more. Exceeding that window quietly degrades the material, sometimes requiring a full and costly replacement before construction can continue.
No, and this mix up trips up a lot of homeowners. A vapor barrier is designed to block vapor movement almost entirely. While Tyvek house wrap is intentionally vapor permeable, testing between 56 and 58 perms. That permeability lets trapped moisture escape the wall assembly rather than sealing it in. Which is a very different job than a true vapor barrier performs.
